Walsh College UAE WhatsApp
Account Setup · Student Portal

Setting up your Okta account, step by step.

All Walsh Portal users must activate their Okta account before logging in for the first time. Follow this guide to complete registration, set a secure password, and enable multi-factor authentication.

Setup at a Glance

6
Registration
steps
3
MFA methods
available
2+
MFA methods
recommended
1
Required to
complete
Portal sso.walshcollege.edu
Support Email support@walshcollege.ae
MFA Required Yes — All Users
Platform iOS & Android
First-Time Login Okta Verify Google Authenticator SMS Authentication Multi-Factor Auth

Having trouble? Contact support@walshcollege.ae or helpdesk@walshcollege.edu for a new activation link

Go to Student Portal →
Before You Begin

Three Things to Know.

All Walsh Portal users must activate their Okta account before logging in. Here is what you need to have ready before starting.

01
📱
Download Okta Verify
Before you begin account activation, download the Okta Verify app on your mobile device. It is available on both the App Store (iOS) and Google Play (Android) and is required during setup and for ongoing MFA sign-in.
02
✉️
Activation Email
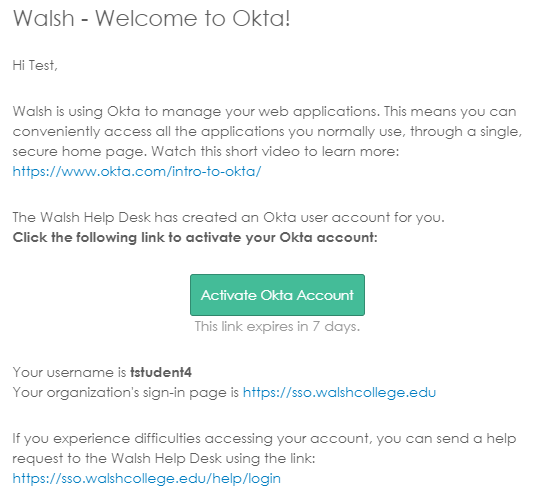
You will receive an official Okta activation email containing your username and your organisation sign-in link. This link has an expiry time — act on it promptly after receiving it.
If the link expires and shows "token expired" — contact support@walshcollege.ae or helpdesk@walshcollege.edu immediately for a new link.
03
🛡
MFA is Mandatory
Multi-Factor Authentication is required for all Walsh staff, faculty, and students. You must configure at least one MFA method. We strongly recommend setting up two methods in case one is unavailable.
First-Time Login

Account Activation — Step by Step.

Follow these six steps to activate your Walsh College Okta account. Have your activation email and mobile phone ready before you start.
1
Download Okta Verify
2
Receive Activation Email
3
Set Your Password
4
Security Question
5
Recovery and Verification
6
Complete Setup
Step 1 of 6
Download First
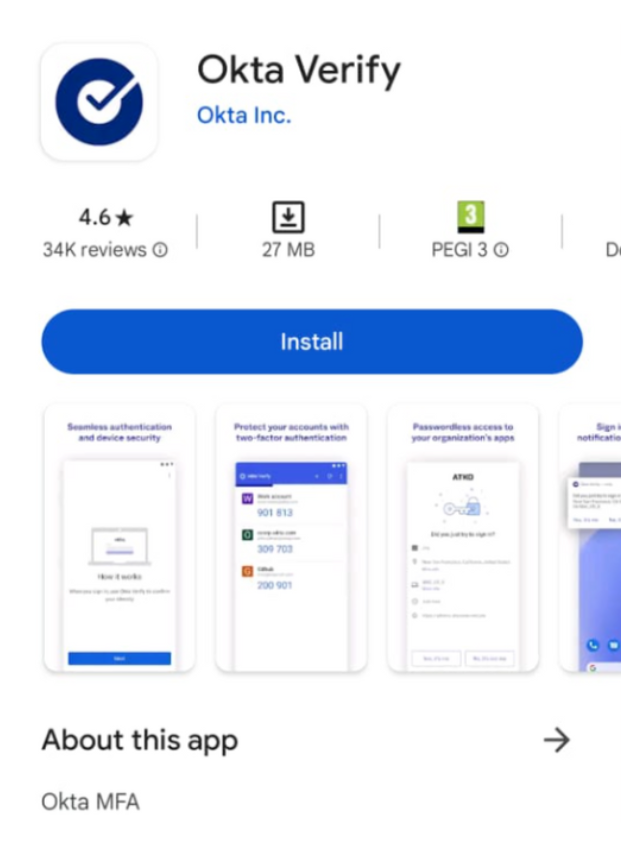
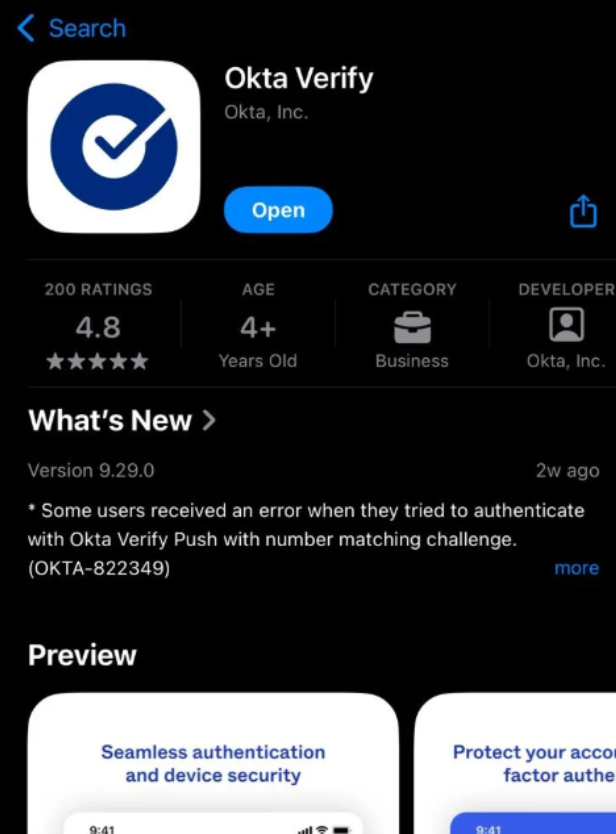
Download the Okta Verify App
Before activating your account, download Okta Verify on your mobile device. It is required for account activation and for authenticating every future sign-in.
Okta Verify App Store Okta installation
  • Open the App Store (iPhone) or Google Play (Android)
  • Search for Okta Verify and install the official app by Okta, Inc.
  • Open the app and leave it ready — you will use it later to scan a QR code
Step 2 of 6
Check Your Email
Receive Your Okta Activation Email
Walsh College will send you an official Okta activation email containing your username and your organisation sign-in link. Open it on a desktop or laptop for the best experience.
Okta activation email
Token Expired? If the link shows a "token expired" message, do not attempt multiple logins. Contact support@walshcollege.ae or helpdesk@walshcollege.edu for a fresh activation link.
  • Check your registered email inbox and spam folder for an email from Okta
  • Click the activation link — this opens the Walsh College Okta setup wizard
  • Never share your activation link or username with anyone
Step 3 of 6
Create Credentials
Create a Secure Password
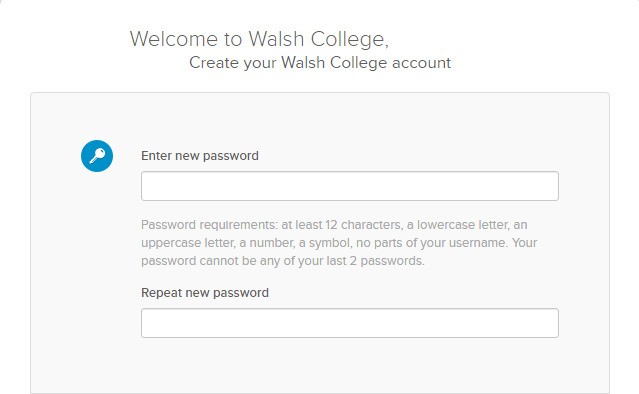
You will be prompted to create a new password on the activation page. Follow Walsh College security guidelines — use a mix of uppercase, lowercase, numbers, and symbols.
Password setup screen
  • Minimum 8 characters using a mix of uppercase, lowercase, numbers, and symbols
  • Do not reuse a password previously used for Walsh accounts
  • Store your password securely — consider using a password manager
  • Never share your password with anyone including IT support staff
Step 4 of 6
Account Recovery
Set Your Security Question
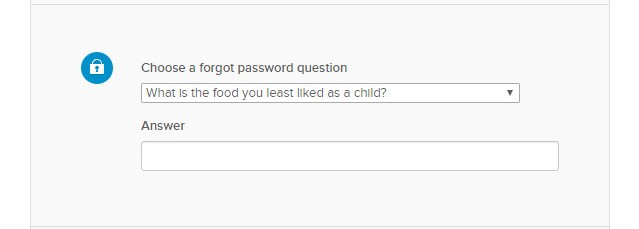
Select a security question and provide your answer. This is used to verify your identity during account recovery if you are ever locked out.
Security question screen
  • Select a security question from the provided dropdown
  • Type your answer carefully — it is case-sensitive in some configurations
  • Write down and store your answer safely alongside your password
Step 5 of 6
Recovery and Verification
Add Phone Number and Security Image
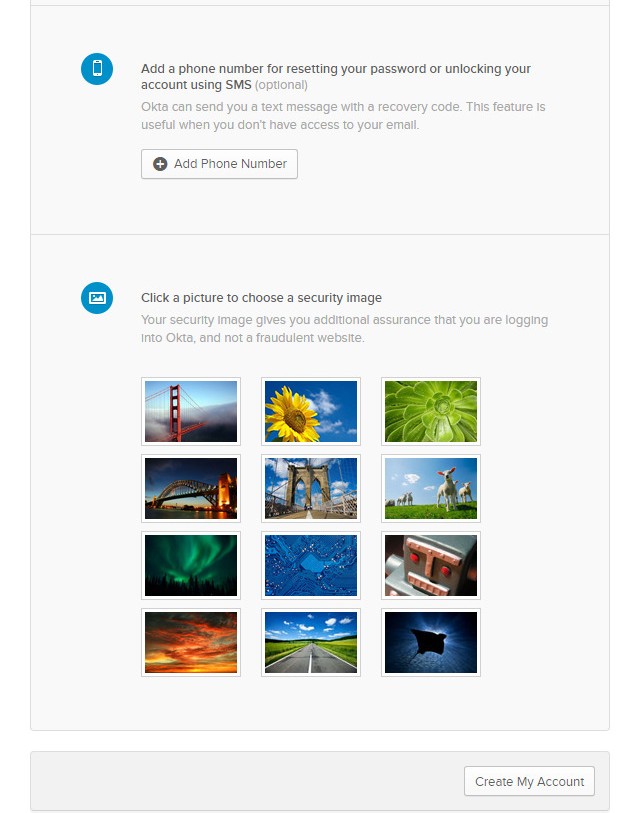
These optional but recommended steps add extra protection to your account and make recovery significantly easier if you ever lose access.
Security options
  • Phone number (optional) — used for SMS-based password resets and account unlocks
  • Security image (optional) — a personalised image shown on the login page to confirm you are on a genuine Walsh sign-in page
  • Walsh recommends adding both for maximum account protection
Walsh strongly recommends setting up two-factor authentication after completing this step. Proceed to the MFA section below once registration is done.
Step 6 of 6
All Done
Complete Setup and Access Your Dashboard
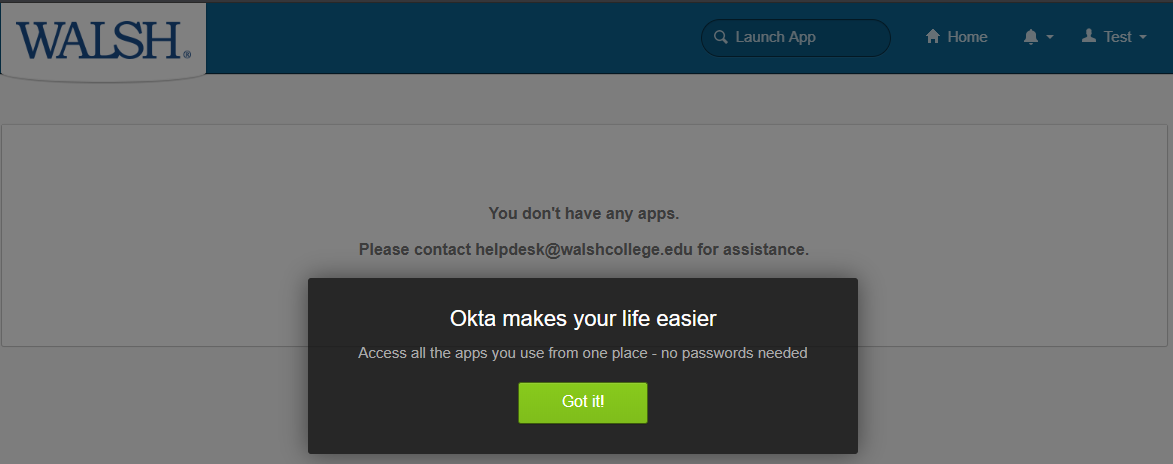
Review your account details and click Finish. You will be redirected to your Okta dashboard with shortcuts to all authorised Walsh applications.
Okta dashboard
  • Click Finish to complete account activation
  • You will land on the Okta dashboard showing all Walsh applications
  • Access the Student Portal, Moodle, and all authorised tools from one secure dashboard
  • Proceed to MFA setup below — it is mandatory for all Walsh users
Multi-Factor Authentication

Enable MFA — Required for All Users.

MFA is a mandatory extra layer of security for all Walsh staff, faculty, and students. Choose at least one of the three methods below — we strongly recommend setting up two.

Why is MFA Required?

MFA verifies your identity using a second factor beyond your password — making it significantly harder for unauthorised users to access your Walsh account, even if your password is ever compromised. All three methods are equally valid but differ in convenience and offline capability.

🛡
📲
Okta Verify
Recommended

Push notifications and time-based one-time passcodes via the Okta Verify app. The most seamless MFA method — approve sign-ins with a single tap on your phone.

  • Download and open Okta Verify
  • Click Setup when prompted in your browser
  • Scan the QR code with your phone camera
  • Click Finish to complete enrollment
🔑
Google Authenticator
Alternative

Generates a six-digit time-based code every 30 seconds. Works entirely offline and is a strong backup when Okta Verify is unavailable. Lock-out after 5 failed attempts requires admin reset.

  • Download Google Authenticator
  • Click Set up when prompted in browser
  • Scan QR code or enter secret key manually
  • Enter the 6-digit code to confirm setup
💬
SMS Authentication
Backup Option

Receive a one-time verification code via text message. Requires mobile signal — best used as a backup method alongside Okta Verify or Google Authenticator, not as your only MFA method.

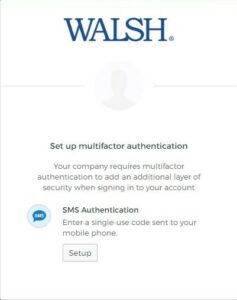
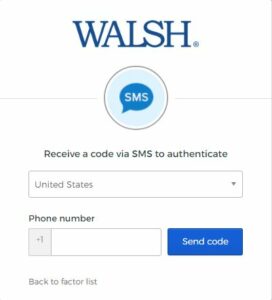
  • Click Setup next to Text Message Code
  • Enter your mobile phone number
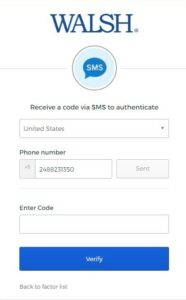
  • Click Send Code and enter the token
SMS messages will be sent on each login even if you previously opted out. If this is a concern, use a different MFA method.
Strongly Recommended: Configure more than one MFA method in case SMS or wireless services are unavailable when you need to sign in. Okta Verify plus SMS is the most reliable combination for most users.
Full Setup Guides

Complete Instructions for
Every MFA Method.

Click any section below for step-by-step setup, QR code scanning, manual configuration, and troubleshooting instructions.

Device Enrollment

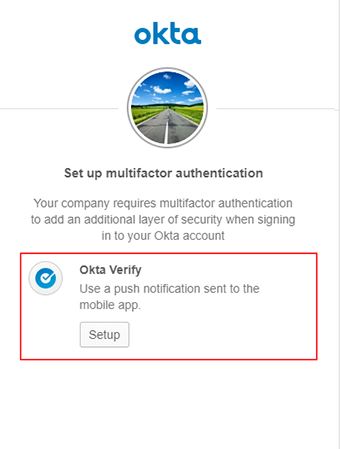
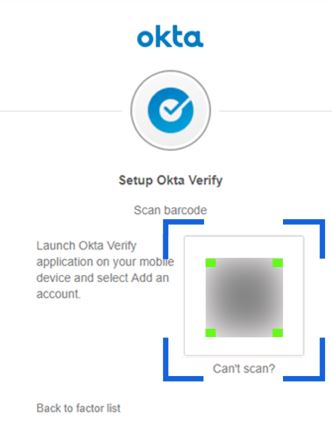
When you attempt to log in to your Walsh account for the first time after registration, you will be prompted to enrol your device with Okta Verify. During enrollment, the app uses your device camera to scan a QR code displayed in your browser.
Initial Setup Process

  • Click Setup when prompted on the "Set up multi-factor authentication" screen
  • Select your device type and click Next
  • Open the Okta Verify app on your phone
Okta MFA setup step 1 Okta MFA setup step 2
  • iOS: Tap Add Account, allow notifications and camera access, then point your camera at the QR code shown in your browser
  • Android: Tap the + icon, then point your camera at the QR code in your browser
  • Allow camera access and scan the QR code when prompted
  • Click Finish in your browser to complete enrollment

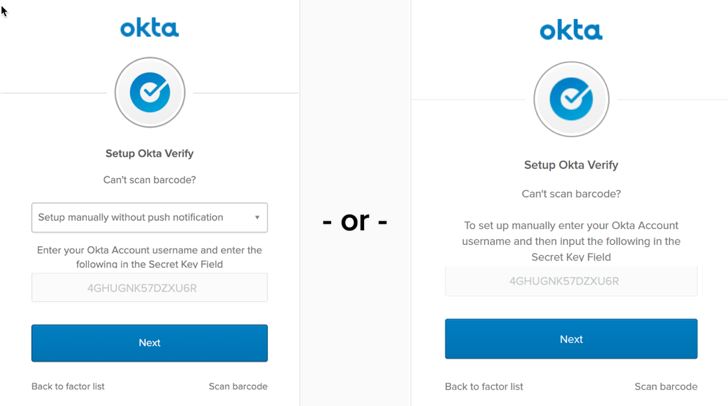
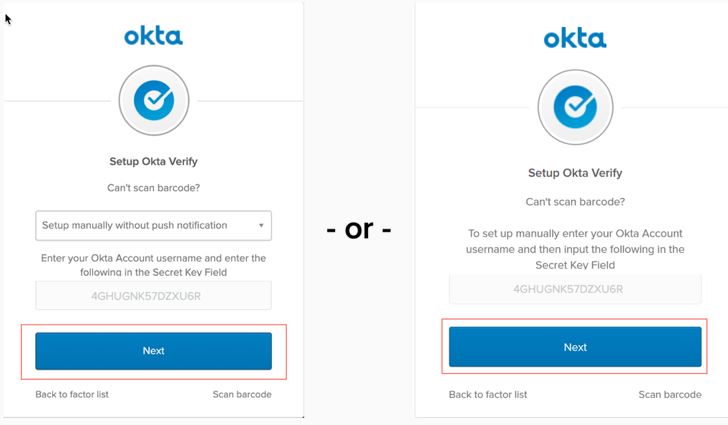
Cannot Scan the QR Code?

Use the manual setup method if your camera cannot scan the QR code displayed in the browser.
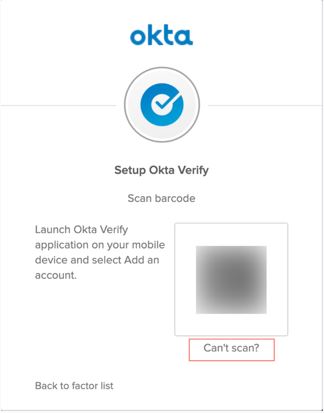
  • Click "Can't scan?" in your browser
Can't scan option
  • Choose one of the following: Send activation link via SMS, Send via Email, or Set up manually (copy the Secret Key)
Manual setup options No barcode option
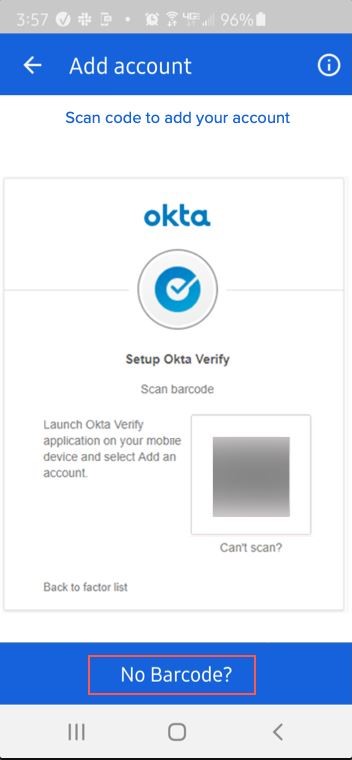
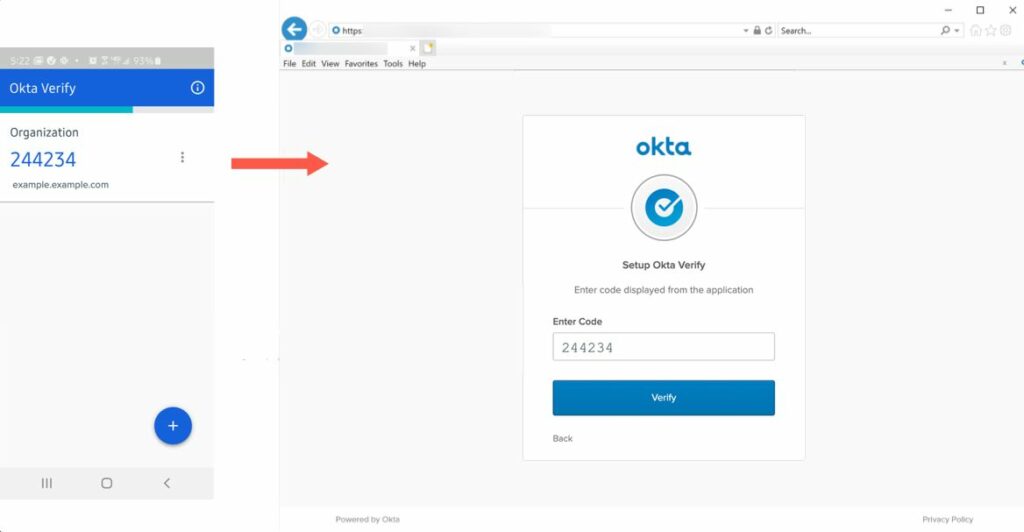
  • Open Okta Verify and select No barcode?
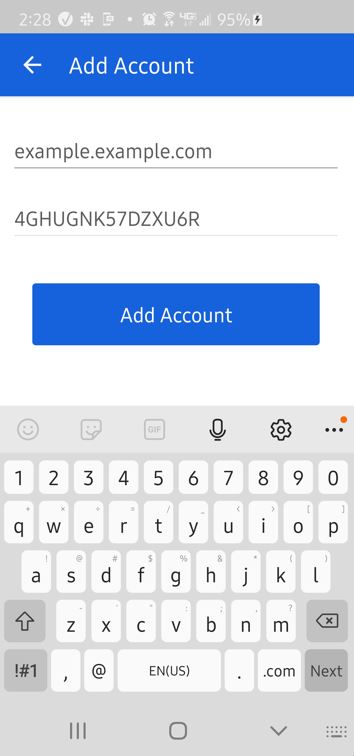
  • Enter your Walsh email address and the Secret Key, then tap Add Account
Enter secret key Verification code
  • Enter the verification code displayed in the Okta Verify app
  • Click Verify to complete manual enrollment
Verify completion

About Google Authenticator

The Google Authenticator app generates a six-digit verification code every 30 seconds. You have 30 seconds to enter the code after it appears. After five unsuccessful attempts, your account is locked and requires an administrator to reset it.
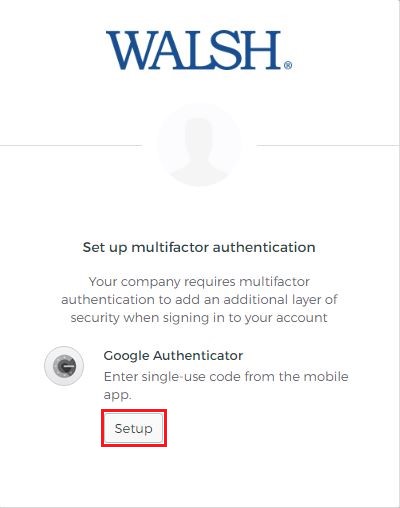
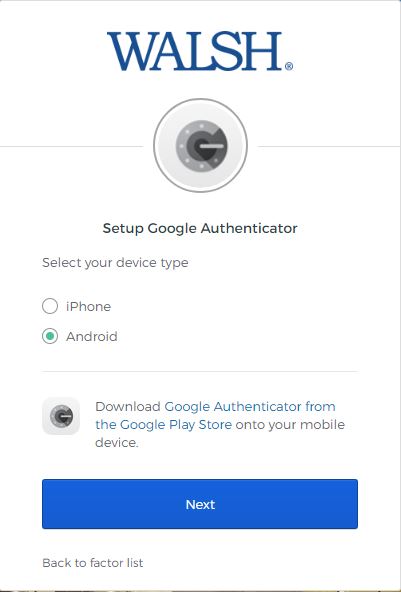
Initial Configuration

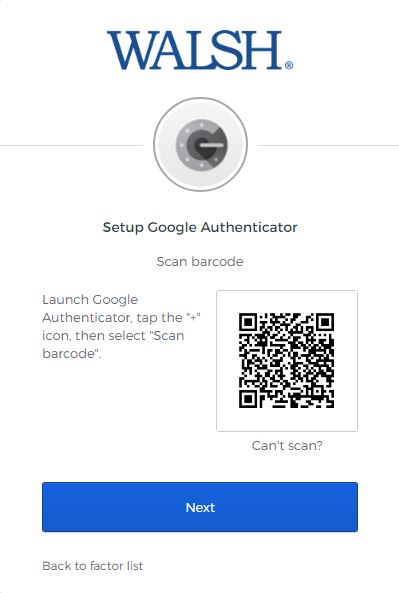
  • Click Set up when prompted in your browser
Google Authenticator setup
  • Select your mobile device type
  • Download and install Google Authenticator from App Store or Google Play
  • Scan the QR code displayed on your screen

Manual Setup

Google Auth options Manual entry
  • Open Google Authenticator and click Get Started
  • Select Enter a setup key to configure manually
  • In the username field enter your Walsh username (e.g. username@walshcollege.edu)
  • Click "Can't scan" on your computer to retrieve the secret key
  • Enter the secret key into the app and click Done
After 5 failed login attempts, your account will be locked and will require admin reset. Contact support@walshcollege.ae if this occurs.

Setup SMS Authentication

  • Click Setup next to Text Message Code in the MFA settings screen
SMS setup
  • Enter your mobile phone number including country code (e.g. +971 for UAE)
  • Click Send Code
SMS send code
  • Enter the security token received via SMS
SMS enter token

Reset or Update Your Phone Number

To change your phone number, go to the Account tab on your Okta homepage and click Setup in the Extra Verification section.

Note: When SMS authentication is enabled, you will receive verification texts each time you sign in — even if SMS opt-out was previously requested on your device. If this is a concern, use Okta Verify or Google Authenticator as your primary method instead.

Need Help? We Are Here.

If you are having trouble with account activation, MFA setup, or accessing the student portal, contact the Walsh technical support team directly. Response times are typically within one business day.

Responsive Footer